The Art of the Latte: A Guide to Steaming Milk and Pouring
Learn how to make a café-quality latte at home. This guide covers the fundamentals of steaming milk to create silky microfoam and the basic techniques for pouring a classic latte.
What is a Latte?
A caffè latte, or simply "latte," is one of the most popular espresso-based drinks in the world. It consists of a shot of espresso, a generous amount of steamed milk, and a thin layer of milk foam on top. The key to a great latte is the texture of the milk: it should be a silky, velvety microfoam that is perfectly integrated with the espresso, not a stiff, bubbly foam floating on top.
The Key: Perfectly Steamed Microfoam
The heart of a great latte is the milk. The goal is to create "microfoam," which is steamed milk with tiny, uniform bubbles that give it a glossy, paint-like texture and a sweet, creamy taste. This is achieved by using an espresso machine's steam wand to both heat the milk and incorporate a small amount of air.
How to Steam Milk for a Latte:
What You'll Need:
- An espresso machine with a steam wand
- A milk steaming pitcher
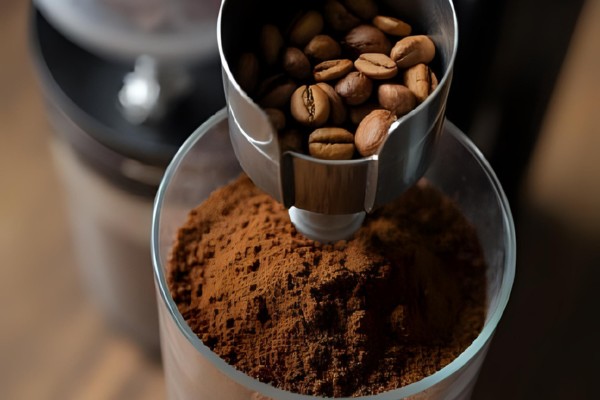
- Cold milk (whole milk works best due to its fat content, but oat milk is a great dairy-free alternative)
- Fill Your Pitcher: Pour cold milk into your steaming pitcher. A good starting point is to fill it to just below the base of the spout.
- Aerate the Milk (Creating Foam): Submerge the tip of the steam wand just below the surface of the milk. Turn the steam wand on. You should hear a gentle "hissing" or "tearing" sound. This is the sound of air being introduced into the milk. Keep the tip near the surface for just a few seconds—long enough to incorporate the amount of foam you want (for a latte, you don't need much).
- Create the Vortex (Heating and Texturing): Once you've added enough air, submerge the steam wand deeper into the milk. Angle the wand so that the milk begins to spin in a circular vortex. This vortex is crucial; it breaks down the larger bubbles into the tiny microfoam and heats the milk evenly.
- Monitor the Temperature: Continue heating the milk until the pitcher is hot to the touch, but not so hot that you can't hold it for a second or two. The ideal temperature for a latte is around 130-140°F (55-60°C). At this temperature, the lactose in the milk is at its sweetest. Overheating the milk will "scald" it, destroying the foam and giving it a burnt taste.
- Turn Off and Wipe: Turn off the steam wand before removing it from the milk. Wipe the wand immediately with a damp cloth to prevent milk from crusting on it.
The Pour: Creating Your Latte
Now that you have your espresso shot and your perfectly steamed milk, it's time to combine them.
- Groom the Milk: Tap the pitcher firmly on the counter a couple of times to pop any large, visible bubbles. Then, swirl the milk in the pitcher for about 10-20 seconds. This is a vital step that polishes the milk and integrates the foam, giving it that beautiful, uniform, glossy sheen.
- The High Pour (Mixing): Start by holding the pitcher high above the cup (about 4-5 inches). Pour a thin, steady stream of milk into the center of the espresso. This high pour allows the milk to dive underneath the espresso's crema, mixing the two together. Fill the cup about halfway like this.
- The Low Pour (Creating the Design): Now, bring the spout of your pitcher as close as you can to the surface of the coffee. As you continue to pour, the white microfoam will begin to appear on the surface. Tilt the cup and increase your pouring speed slightly to float the foam on top.
- Create a Heart: For a simple heart design, continue pouring in one spot until you have a large white circle. When the cup is almost full, lift the pitcher and pull the stream of milk through the center of the circle.
Don't worry if you don't get perfect latte art on your first try! It takes a lot of practice. The most important thing is that you've created a delicious, sweet, and creamy latte with beautifully textured milk.